Easy Way to Hang a Garden Fence
A home's boundaries need to be defined to create privacy, enhance security and provide shelter for your garden. While a hedge can take up to five years to establish and a stone wall is costly and time-consuming to install, a timber fence can be erected on a DIY basis within the space of a single weekend. And, with prices starting at as little as £13 per ready-made panel from the major DIY sheds such as B&Q, Wickes and Homebase, a fence is also one of the most affordable ways of creating a boundary for your home.
Ready-made fence panels appear, on the face of it, to be heaven-sent for DIY fans. Stick up a few posts, screw the panels to them and you're done. True in theory — yet if you want your new fence to not only look good, but stay up, there's a bit more to it.
For a long-lasting fence, concreting the posts in is the way forward. Professional fence fitters will carefully measure out all the posts and then concrete them in position before attaching the fence panels. This calls for a meticulous degree of accuracy and can cause real headaches for the DIYer when they come to fit the panels and discover their measurements weren't spot on. Fence panels can't be stretched to fill the resulting gaps, and there's no easy way of moving a concreted-in post.
The solution is refreshingly simple and makes fitting all but the longest fences a weekend job for anyone with a hint of hands-on talent. Follow our step-by-step guide to find out exactly how.
- Wooden stakes
- String
- Tape measure
- Spade
- Fence posts
- Gravel boards
- Bitumen-based pain
- Paintbrush
- Drill
- Screws
- Pencil
- Fence panels
- Batten
- Spirit level
- Quick-setting concrete post mix
- Water
DIY Fitting a Fence: A Step-by-Step Guide
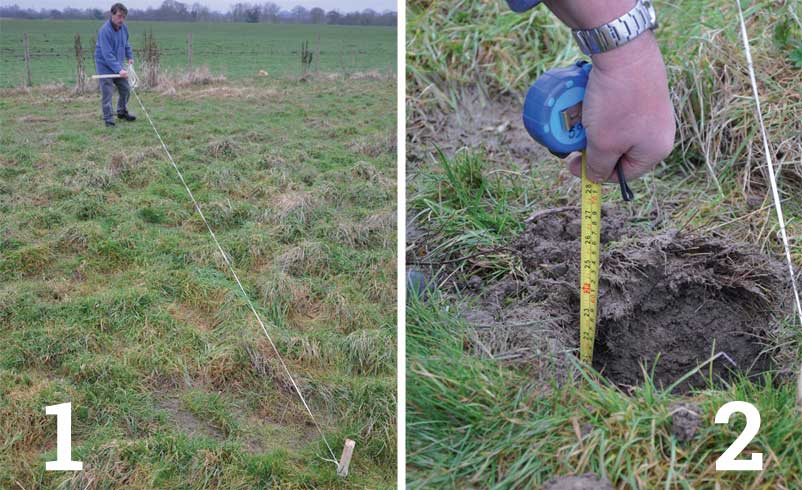
1. To end up with a straight fence you need to start with a straight line. Hammer a wooden stake in the ground at the starting point for the fence. Tie a string to this stake, pull the string out tight and wrap around another stake at the end of the area to be fenced off.
2. Dig a hole 600mm deep with sides the same width as a regular-sized garden spade at the start point of your fence line. This size hole provides enough room for the post and the concrete needed to secure it.
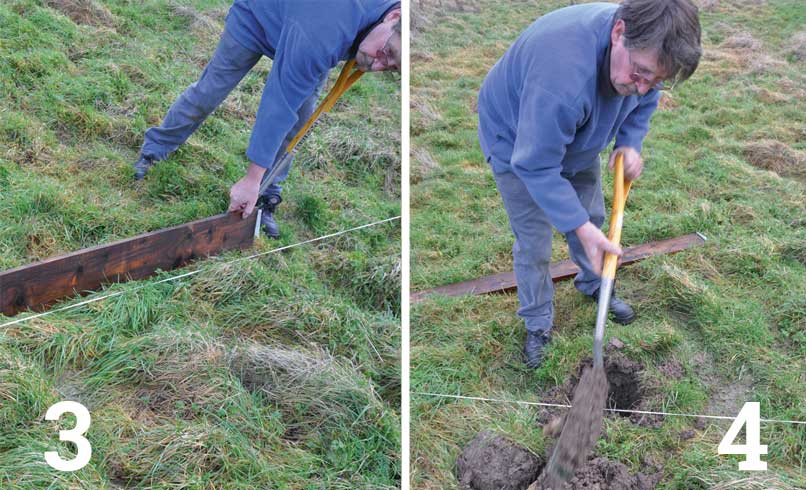
3. Mark out the position of the remaining post holes. You can do this with a tape measure, or a gravel board — it's the same width as the fence panel and makes for a rapid form of measurement.
4. Dig out the remaining post holes using the same method described in Step 2.
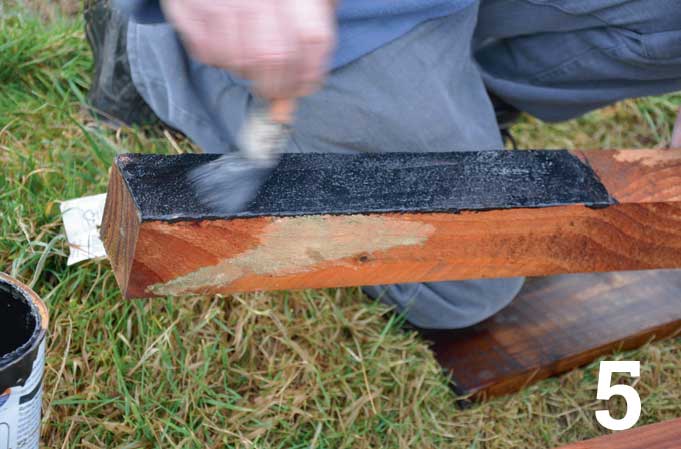
5. Even if a fence post has been pressure treated – where chemical preservatives are forced into the wood – it makes sense to add extra protection for the section of post that will sit in the ground. Brush on a couple of coats of bitumen-based paint on all sides and at the base of the post.
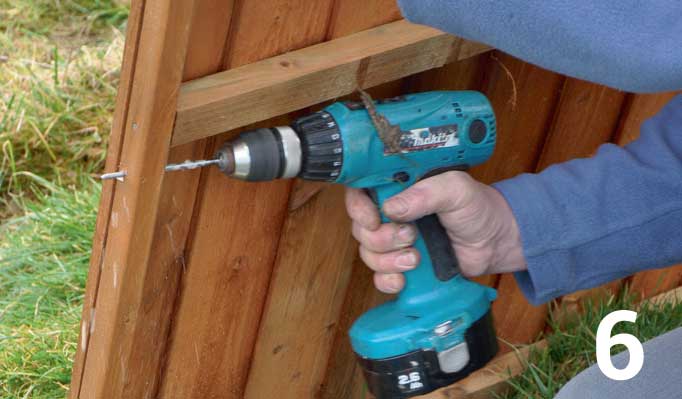
6. While the paint is drying drill four evenly spaced pilot holes through the side bars on both sides of each fence panel.
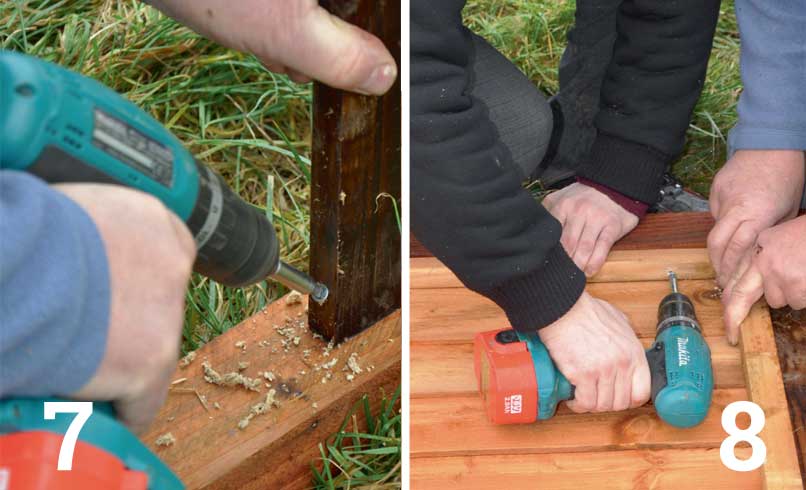
7. It's a good idea to use a gravel board at the foot of the panel to stop the end grain touching the ground and absorbing moisture. Position the gravel board just above the bitumen-painted section of the post. Drill a pilot hole diagonally through the edge of the gravel board and into the post on both sides — use a couple of screws to secure the board. Even if you're not using a panel with vulnerable end grain, a gravel board will prolong the life of the fence — particularly for those that run over the top of grass or soil, which, given our UK climate, will invariably be waterlogged.
Leave a 5mm gap between the base of the fence panel or gravel board and the ground over hard surfaces like concrete. This allows water to wash underneath, rather than soak into the wood.
8. Attach the panel to a post on both sides, screwing through the pilot holes made in Step 6.
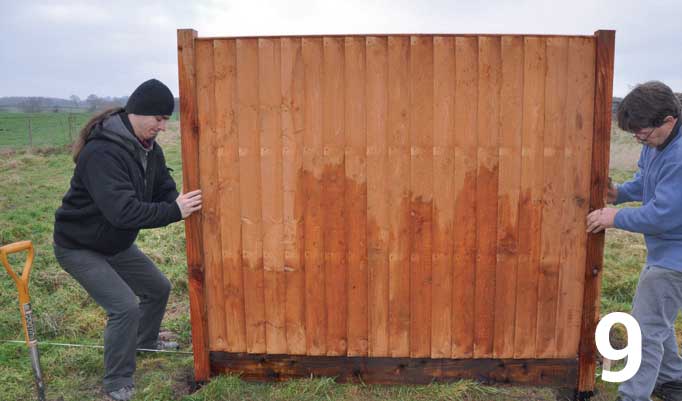
9. Lift the fence panel into position and lower the posts into the holes. Prop the panel in position with a length of batten run diagonally from the ground to the top of the panel.
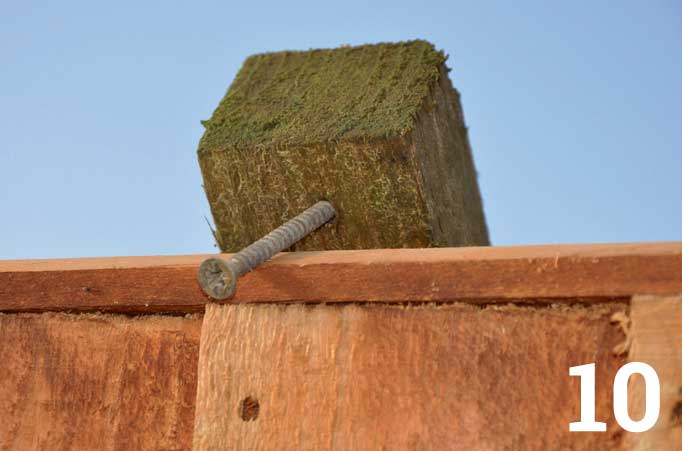
10. A screw through the top of the batten forms a neat hook that stops the panel from moving forwards or backwards.
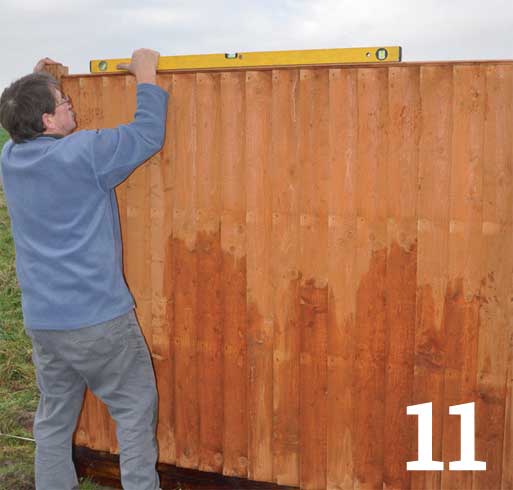
11. Use a spirit level to check the fence panel is level across the top and then check that the posts are vertical. Adjust as necessary. Add rubble to each hole to help keep the posts vertical.
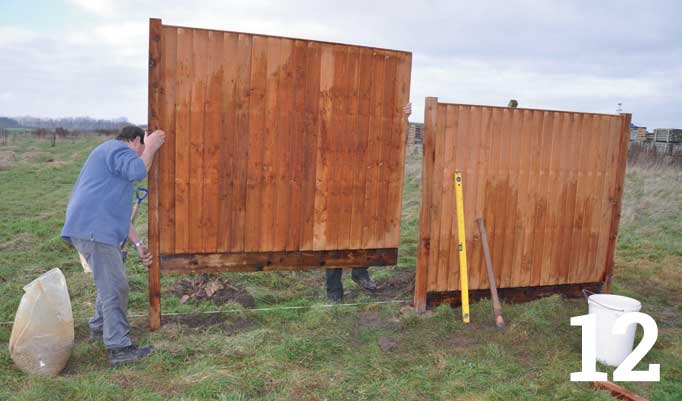
12. With the first panel secure, fix a post to one edge of the next fence panel and lower the panel and post into position. Use a batten to secure the panel (see Steps 9 to 10) and then check for level before screwing the new panel to the existing post. Add rubble to the hole and then repeat this whole step until all the fence panels are in position.
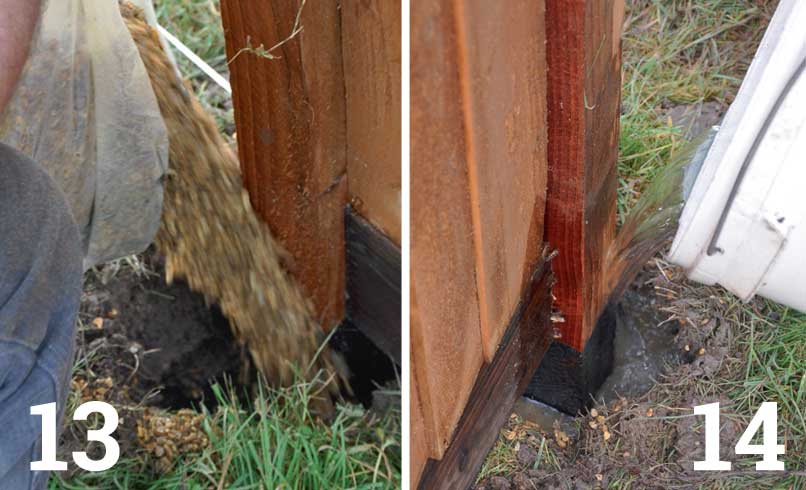
13. Once all the panels are in place check again for level and, with all posts vertical, the fence posts can be concreted in. You can mix up your own cement and ballast to make concrete, but it's far easier to buy bags of ready-mixed, quick-setting 'post mix'. The brand used here allowed the mix to be poured in dry and tamped down with a piece of wood.
14. Pour water into the hole and tamp down to make up a stiff mix. Keep the mix just below the natural level of the ground so the set concrete can be covered over with earth or turf later on.
Source: https://www.homebuilding.co.uk/advice/how-to-fit-a-garden-fence
0 Response to "Easy Way to Hang a Garden Fence"
Post a Comment